In the contemporary digital age, booking train tickets should be as simple as a few taps on your smartphone. Thanks to the IRCTC app, securing a seat for your journey within India has never been easier. This article will explore how to navigate the IRCTC app for smooth ticket booking, from installation to confirmation.
Why Use the IRCTC App?
The Indian Railway Catering and Tourism Corporation (IRCTC) app provides an efficient platform for booking train tickets, managing your bookings, and tracking trains. With over 100 million downloads and a user rating of 3.5, many individuals trust this app for their travel needs.
Key Features:
- Instant Booking: Reserve your tickets quickly.
- Real-time Availability: Get updated information on train schedules and seat availability.
- User-Friendly Interface: Designed for convenient navigation.
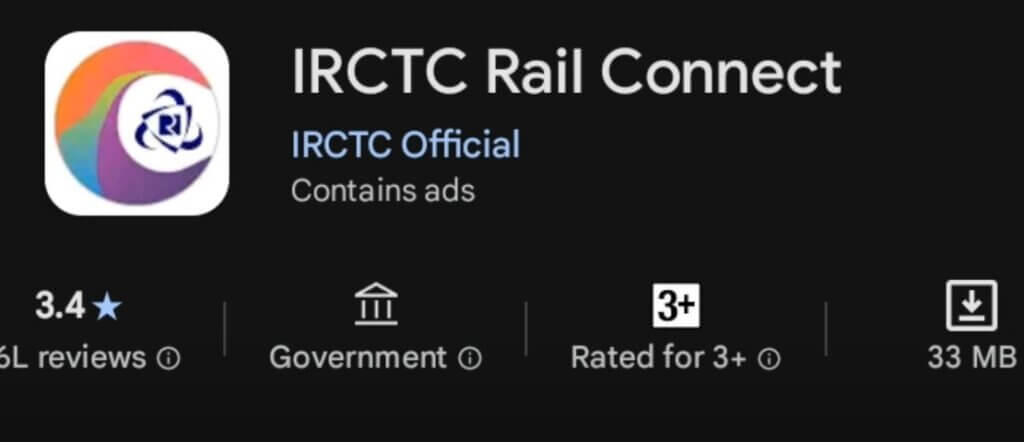
How to Download the IRCTC App
- Open the Play Store on your smartphone.
- Search for “IRCTC Rail Connect“ app.
- Install the app by following the prompts.
After installation, open the app to begin booking your train ticket.

How to Booking Your Train Ticket Using IRCTC App
Here’s a step-by-step guide to help you through the booking process:
Step 1: Launch the App
- Open the IRCTC app from your mobile device.
- You will be directed to the main dashboard, where you’ll see multiple options for ticket booking, inquiries, and more.
Step 2: Search for Trains
- Click on “Book Ticket” at the top of the screen.
- You will see two fields: From and To.

Step 3: Select Your Route
- In the “From” field, enter your departure station. For example, if you are traveling from Dhampur, type “Dhampur” and select it from the suggestions.
- In the “To” field, enter your destination, such as “Dehradun.”
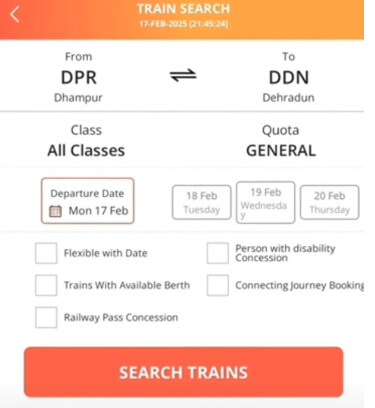
Step 4: Choose Your Travel Date
- Select the date on which you wish to travel by tapping on the date field.
- After selecting the date, press “Search Train” to view available trains on that day.
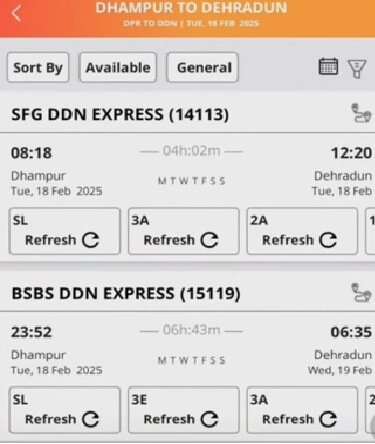
Step 5: Select Your Train
- Review the list of trains that shows departure and arrival times.
- Select the train that best fits your schedule by clicking on its row.
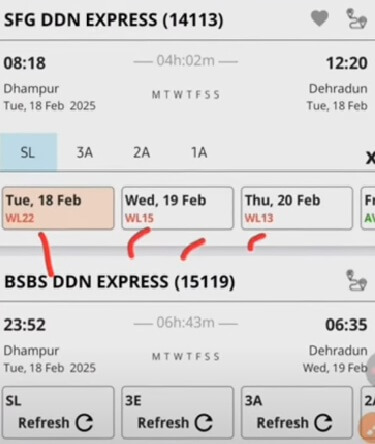
Step 6: Choose Your Class of Travel
- You’ll see various classes such as Sleeper (SL), Three Tier (3A), and Two Tier (2A). Select the travel class according to your preference and budget.
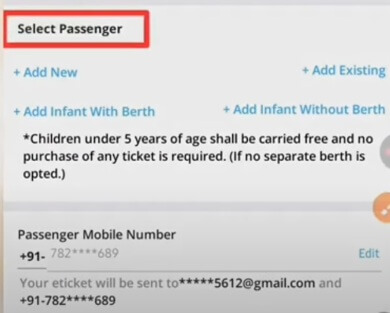
Step 7: Enter Passenger Details
- Click on “Add Passenger” to enter the details of each traveler:
- Name
- Age
- Gender
- Boarding station
- Once done, click “Add Passenger” to confirm.
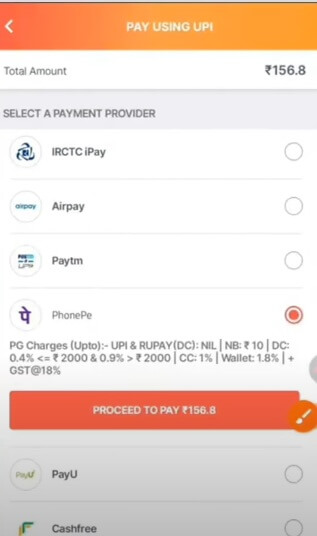
Step 8: Proceed to Payment
- Select your desired payment method. The IRCTC app allows payments via:
- UPI (like PhonePe, Google Pay, Paytm)
- Credit/Debit Card
- Net Banking
- Do take note that certain methods may incur extra service fees.
Step 9: Payment Confirmation
- After selecting the payment method, complete the payment.
- You will receive a confirmation page once the transaction is successful.
Downloading Your Ticket
After booking, you can download your ticket. Here’s how:
- From the main menu, select “Transaction History”.
- Click on “My Booking” to view your booked tickets.
- Click on the booking you wish to download. You’ll find an option to download the ticket in PDF format.
Additional Tips
- Track Your Train: Use the “Track Your Train” feature to stay updated on train statuses.
- Cancel Tickets: If necessary, you can cancel tickets via the app and check refund history.
- Explore More: Look into reviewing your journey details for future reference.
Final Thoughts
Booking train tickets through the IRCTC app can save you time and hassle if you follow the steps outlined above. With the convenience of mobile technology, you can plan your journeys efficiently, ensuring that you arrive at your destination stress-free.